
The Ultimate Guide: How to Sew a Bomber Jacket Like a Pro

Making a lined jacket is a big step for any home sewer. It's a jump into more complex clothing construction. But the reward is worth it—a timeless, stylish piece you can wear with pride. This guide will show you exactly how to sew a bomber jacket.
We'll walk you through choosing the right materials and preparing your pattern. Then we'll cover constructing the jacket step-by-step. A bomber jacket might seem scary at first. But we've broken it down into manageable stages. With careful preparation and attention to detail, you can create a professional-quality garment right at your own sewing machine.
Gearing Up: Essential Tools and Materials
A successful project starts with proper preparation. Gathering all your tools and materials beforehand ensures a smooth sewing experience. No interruptions. This checklist covers everything you'll need to get started on your bomber jacket tutorial.
Your Sewing Toolkit
Having the right tools is essential for a clean finish. Most of these are standard for any sewing project. But a few are especially important for jacket construction.
- Sewing machine with straight and zigzag stitch capabilities
- Needles: A universal size 80/12 is a good start. Consider a Microtex/Sharp needle for delicate fabrics like satin.
- All-purpose polyester thread that matches your main fabric
- Fabric scissors or a rotary cutter and mat for precise cutting
- Pins and/or sewing clips (clips are essential for faux leather)
- Tape measure and a seam gauge for accurate measurements
- Tailor's chalk or a water-soluble fabric marker
- Seam ripper, because nobody is perfect
- Iron and ironing board for pressing seams at every step
Fabric and Notions Checklist
Choosing your fabric is part of the creative fun. But the notions are the functional backbone of your jacket. Refer to your pattern for exact quantities.
| List Item | Recommended Quantity | Pro-Tip |
|---|---|---|
| Bomber Jacket Pattern | 1 | Choose a commercial (Simplicity, Vogue) or indie PDF pattern. Beginner patterns often have fewer pieces and more detailed instructions. |
| Main Fabric | ~2-2.5 yards (2.3m) | Select based on your desired look and skill level. See our deep dive below. |
| Lining Fabric | ~2 yards (1.8m) | Bemberg, acetate, or charmeuse are great choices as they are slippery and make the jacket easy to put on and take off. |
| Ribbing | ~0.5-1 yard (0.9m) | This is for the collar, cuffs, and hem. It must have excellent stretch and recovery. |
| Separating Zipper | 1 | The length must match your pattern's front opening measurement. A separating zipper is crucial as it comes completely apart. |
| Interfacing | ~0.5 yards (0.5m) | Use lightweight fusible interfacing to stabilize the front zipper area and any welt pockets. |
Choosing the Perfect Fabric: A Deep Dive
The fabric you choose will define your bomber jacket's character. It influences both the style and the difficulty of the project. Making an informed choice is key to success.
For a Classic Look (Intermediate Friendly)
These fabrics are stable and relatively easy to work with. They're ideal for your first time sewing a bomber jacket.
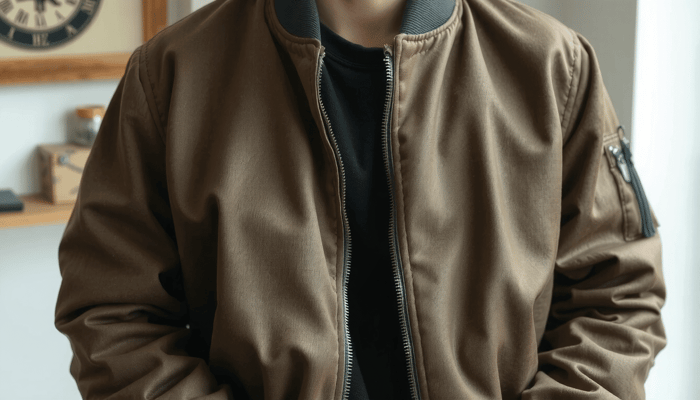
- Twill/Canvas: These materials are durable and press well. They're easy to handle. They create a structured, classic MA-1 flight jacket silhouette that is both timeless and versatile.
- Wool Blends: For a warmer, more luxurious jacket, a wool blend is an excellent choice. It drapes beautifully. But it may require a press cloth and careful temperature control when ironing to avoid scorching.
For a Modern or Luxe Vibe (Requires More Care)
These fabrics can produce a stunning, high-fashion garment. But they demand more patience and specific techniques.
- Satin/Brocade: These fabrics create a statement jacket with a beautiful sheen. They are slippery and prone to snagging. Use a microtex needle to prevent runs. Be sure to place pins only within the seam allowance to avoid leaving permanent holes.
- Faux Leather/Suede: An edgy and stylish choice that mimics the look of real leather. These fabrics do not self-heal from pinholes. So use sewing clips instead of pins. A Teflon or walking foot is essential to prevent the fabric from sticking to your machine.
What About the Ribbing?
The ribbing for your collar, cuffs, and hem is critical. It needs to be functional as well as aesthetic. Look for a quality rib-knit with good spandex or elastane content. This ensures it snaps back into shape after being stretched.
For a classic bomber look, you need ribbing with at least 50-75% stretch and excellent recovery. This allows it to gather the main fabric at the hem and cuffs. It creates that signature blouson effect.
How to Sew Your Bomber Jacket: The Step-by-Step Guide
Now we get to the heart of the project: the construction. Follow these steps methodically. Press your seams at every stage for the best results. This is how to sew a bomber jacket from flat fabric to a finished piece.
Step 1: Pattern Preparation and Cutting
- Pre-wash and press your main fabric and lining. This crucial step prevents shrinkage after the garment is complete.
- Read your pattern instructions thoroughly. Lay out the pattern pieces on your fabric. Pay close attention to the grainline arrows.
- Carefully cut all pieces from your main fabric, lining fabric, and interfacing. Transfer every marking accurately—notches and dots are important.
Step 2: Assembling the Outer Shell
- With right sides facing, sew the front and back shoulder seams together. Press the seams open to reduce bulk. You can follow a straightforward guide to jacket assembly for visual cues.
- Attach the sleeves. Carefully pin the sleeve head into the armscye (the armhole of the jacket body). Match all notches. Ease the sleeve cap in without creating puckers.
- Sew the side seams and the underarm sleeve seams in one long, continuous line. Go from the cuff to the hem.
Step 3: Constructing the Lining
- Repeat the entire assembly process from Step 2 using your lining fabric pieces.
- Here is the most important difference: when sewing the lining's sleeve seam, leave a 6-8 inch (15-20 cm) opening in one of them. This gap is essential for turning the jacket right side out later.
Step 4: Attaching the Ribbing (Collar, Cuffs, Hem)
- Take your ribbing pieces for the collar, cuffs, and hem. Fold them in half lengthwise with wrong sides together and press. If they are cut on the fold, you'll sew the short ends together first to form a loop.
- Pin or clip the raw edges of the folded ribbing to the corresponding raw edges of the jacket shell. This includes the neckline, sleeve openings, and bottom hem.
- You will need to gently and evenly stretch the ribbing to fit the jacket opening. Use a stretch stitch or a narrow zigzag stitch to sew it on. This allows the seam to stretch with the ribbing.
Step 5: Installing the Zipper
- Fuse the interfacing strips to the wrong side of the front opening edges of the outer shell. This provides stability and prevents the fabric from stretching.
- With the zipper open, place one side of the zipper tape face down on the right side of the jacket front. Align the edges.
- Using a zipper foot on your machine, sew the zipper tape in place. Close the zipper to mark the position for the other side. This ensures it aligns perfectly at the collar and hem. Then pin and sew the second side.
Step 6: "Bagging" the Lining for a Clean Finish
- This technique creates a beautiful, fully enclosed interior with no visible raw seams. Place the outer shell right side out. Turn the lining inside out.
- Place the outer shell inside the lining, so that the right sides of both the shell and lining are facing each other. It will look like a jacket-inside-a-jacket.
- Carefully align and pin all the outer edges. Go up one front, around the neckline, down the other front, and all along the bottom hem. The zipper will be sandwiched between the layers.
- Sew all the way around this pinned edge. The final steps often involve this professional technique.
- Now, reach into the hole you left in the lining sleeve. Gently pull the entire jacket through it. It will seem impossible at first. But keep pulling carefully until the whole jacket is right side out.
Step 7: Finishing Touches
- Push the lining neatly inside the shell. Give the entire jacket a final, careful press. Focus on the front edges and collar for a crisp look.
- Topstitch around the zipper and neckline, about 1/4 inch (6mm) from the edge. This secures the lining and gives a professional finish.
- Finally, turn the lining sleeve inside out. Close the opening with a neat hand-sewn slip stitch.
Troubleshooting Common Bomber Jacket Pitfalls
Even experienced sewists run into challenges. Here's how to handle some common issues when making a bomber jacket.
Problem: My zipper is wavy.
- Solution: This is almost always caused by the fabric stretching during sewing. Always use fusible interfacing along the zipper placket for stability. You can also use double-sided wash-away seam tape to hold the zipper perfectly in place before you stitch it down.
Problem: My ribbing is puckered or too loose.
- Solution: The key is even distribution of stretch. Before sewing, divide both the ribbing loop and the jacket opening into quarters. Mark them with pins. Match these quarter-pins together. Then stretch the ribbing evenly between the pins as you sew.
Problem: My seams are bulky, especially with thick fabric.
- Solution: Grade your seams. This means trimming the layers of the seam allowance to different widths. The layer closest to the outside of the garment should be the widest. This reduces bulk and helps the seam lie flat. Always press seams open wherever the pattern allows.
Beyond DIY: Customization and Professional Manufacturing
Once you master the basic construction, you can start customizing. Adding details is what makes your garment uniquely yours.
Making It Your Own
Consider adding welt pockets for a more traditional look. Try quilting your fabric panels before you cut them for a textured effect. Or use a contrasting fabric for the sleeves to create a varsity-style jacket. These small changes can have a huge impact on the final garment.
Need a Batch of Custom Jackets?
Sewing a single jacket is a deeply rewarding project. However, producing multiple jackets for a team, a brand launch, or a special event requires a different level of expertise and equipment. For high-quality, consistent results on a larger scale, partnering with a professional manufacturer is the most efficient solution. If you're looking to produce a line of custom bomber jackets, exploring options with an experienced garment maker can bring your vision to life. For more information on professional apparel production, you can explore services at Eton Garment.
Frequently Asked Questions (FAQ)
Here are answers to some common questions about how to sew a bomber jacket.
What is the best pattern for a beginner trying to sew a bomber jacket?
Look for patterns specifically labeled "Beginner" or "Easy." These patterns typically feature simpler construction. Think integrated (cut-on) facings, fewer pattern pieces, and they may omit complex details like welt pockets. Many indie pattern companies also offer detailed photo tutorials or video sew-alongs. These are invaluable for visual learners.
Can I make a bomber jacket without a lining?
Yes, you can create a fantastic unlined bomber jacket. This is a great option for a lighter-weight, transitional piece. If you omit the lining, you must finish the interior seams neatly for durability and a professional appearance. Techniques like using a serger, binding the seams with bias tape, or sewing flat-felled seams are all excellent options.
How do I get the gathered look at the hem and cuffs?
That classic gathered or "blouson" effect is created by the ribbing. The pattern piece for the ribbing is cut significantly shorter than the edge of the jacket it will be attached to. When you stretch the ribbing to fit the fabric opening as you sew, the ribbing's natural elasticity pulls the fabric inward. This creates the signature gathers.
Can I use a regular zipper instead of a separating one?
No, a separating zipper is essential for a jacket that needs to open completely at the front. A regular, or closed-end, zipper does not come apart at the bottom. It's designed for applications like pant flies, pockets, or the back of a dress where the seam remains joined at one end.
How much seam allowance should I use?
Always follow the seam allowance specified in your chosen pattern. This is a critical instruction for ensuring the finished garment pieces fit together correctly. Commercial patterns from "The Big 4" (Simplicity, McCall's, etc.) typically use a 1.5 cm (5/8 inch) seam allowance. Many independent and PDF patterns use a 1 cm (3/8 inch) seam allowance. Check the pattern instructions before you start sewing.
Related Articles
The Ultimate Guide: How to Wear a Denim Jacket in 2025 for Effortless Style
The denim jacket is not just a piece of clothing but a cultural emblem. For decades, it has been the... more »

The Definitive Biker Jacket Style Manual: Pairing Suggestions for Every Individual and Tradition
The Biker Jacket's Alluring Charm Through the AgesAn authentic leather biker jacket is not merely a... more »