
DIY Guide: Transforming a Denim Jacket into a Vest (3 Techniques for a Flawless Vest)

Table of Contents
- Preliminary: Well Prepared
- The Core Choice: The 3 Methods of Cutting Compared
- How to Cut Sleeves Off a Denim Jacket: Step-by-Step Guides
- Mastering the Finish: From Perfecting the Fray to a No-Sew Hem
- Beyond the Cut: Style It Your Way with Your New Denim Vest
- Conclusion: Your Jacket, Your Creativity
- Frequently Asked Questions (FAQ)
- FAQs
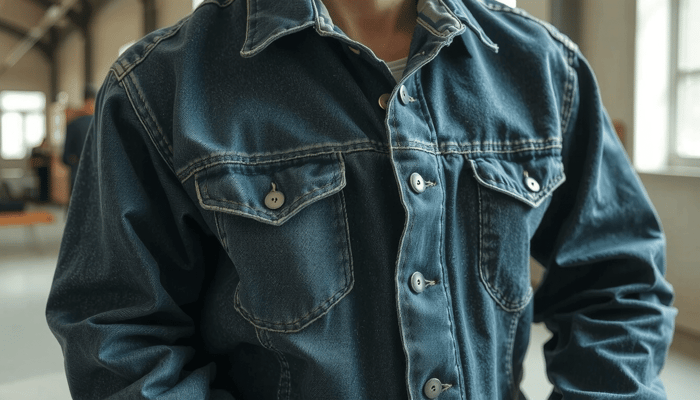
A denim jacket is a wardrobe essential that will never go out of style. However, a classic piece in a person's closet may need a little creativity. The transformation of it into a vest is perhaps one of the best ways to do a fun but not too complicated DIY project. It makes an old favorite feel new again very quickly.
This guideline contains all the information you need to get your denim jacket sleeveless. In particular, we will discuss three methods to cut sleeves off. You can choose the method that gives you exactly the style you want, i.e., a perfectly fitted vest or an edgy, punk-inspired "battle jacket."
The sequence of operation.
- Preparing the necessary tools.
- Choosing between a clean and a frayed edge.
- Three detailed, step-by-step cutting techniques.
- Pro tips for completing and styling your new vest.
Preliminary: Well Prepared
The proper preparation is the decisive factor for the success or the regrettable failure of an upcycling project. A few minutes spent on organization will lead to a good, professional-looking finish. Always work on a flat, solid surface which ensures accuracy.
Selecting the Right Denim Jacket
The type of fabric you choose for your jacket will have a huge effect on the final look. To realize a truly authentic and classy fray, the best option is to find a 100% cotton jacket. You can also cut denim blends containing elastane or spandex but they may not fray as freely or may look pesky compared to a soft one.
After deciding on the choice of jacket, the first step is always washing and drying it. This will pre-shrink the fabric and there will be no surprises regarding the size or fraying after the first wash.
Essential Tools & Materials Checklist
Gearing up with the right equipment is vital for a smooth and efficient process. No need for a full-fledged tailor's workshop. A few vital items will do.
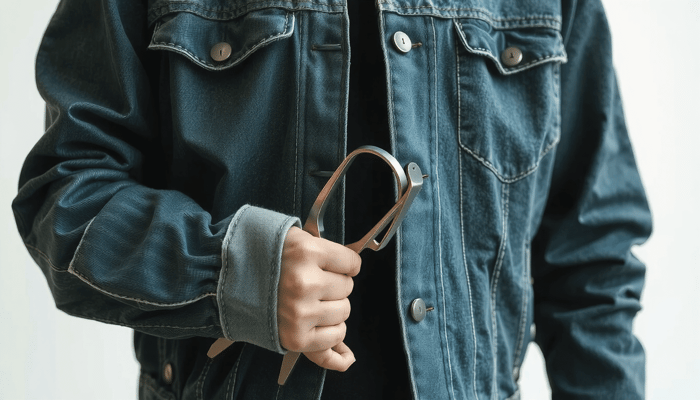
- For Cutting: A sharp pair of fabric scissors, a seam ripper, or a craft knife/box cutter.
- For Marking: Tailor's chalk or a disappearing fabric marker.
- For Measuring: A ruler or flexible measuring tape.
- For Protection: A cutting mat or a thick piece of cardboard (essential if using a knife).
- (Optional) For Finishing: Sandpaper, a pumice stone or a sewing machine, or iron-on hemming tape.
The Core Choice: The 3 Methods of Cutting Compared
The tool you choose is directly responsible for the look of your vest. You will need to determine first if you want a raw, distressed edge, a perfectly clean finish, or a mostly troubled look. This initial decision will guide you to the best route for taking off the sleeves from your jean jacket.
Here's a quick comparison to help you decide.
| Method | Primary Tool | Final Look | Difficulty/Effort |
|---|---|---|---|
| Classic Scissor Cut | Fabric Scissors | Raw, classic fray | Easy |
| Seam Ripper | Seam Ripper | Clean, factory finish | Medium (Time-Consuming) |
| Rip & Distress | Craft Knife/Hands | Heavily frayed, grungy | Easy to Medium |
How to Cut Sleeves Off a Denim Jacket: Step-by-Step Guides
Once you have completed the prep work and chosen your method, it's finally time to actually cut the sleeve off. Each way of doing it is pretty much the same but requires a bit of concentration and patience.
Method 1: The Classic Scissor Cut (For a Frayed Edge)
This is the quickest and easiest method. It's ideal for achieving the raw, edge denim vest that you want.
- Lay the Jacket Flat. Set the jacket on your work surface. Ensure both the body and the sleeve are entirely flat and free of any wrinkles.
- Decide Your Cut Line. You have two main options. For a less conspicuous look, cut along the armhole seam. Or cut about a half inch outside the seam (into the sleeve fabric) to allow for more material to fray.
- Mark Your Line. With tailor's chalk or a fabric marker, mark a clear-cut line around the whole armhole that is as straight as possible. This will ensure that you get a good symmetry and even result.
- Make the First Cut. A pair of fabric scissors that are sharp will do a good job cutting through the denim fabric. The chewed-up scissors will cause a messy edge. From the underarm seam, follow the marked line around with care and precision.
- Repeat on the Other Side. To make sure that both armholes are the same, you can fold the jacket vertically in half. The first cut can be used as a template to exchange information to the mark the second cut.
Method 2: The Seam Ripper Technique (For a Super Clean Finish)
If you want to make a vest with armholes that look perfectly made in the factory, this is the right method for you. Although it takes a bit of time, you will get impeccable results.
- Turn the Jacket Inside Out. This will allow you to clearly see the armhole seam and its stitches.
- Locate the Stitches. Find the main seam that joins the sleeve to the body of the jacket. Generally, it's an overlocked seam or a double stitch type.
- Start Ripping the Seam. Carefully slide the sharp point of the seam ripper under a few stitches. Patience is your best friend here. A bright work area will help you to distinguish the tiny threads. Lightly push the seam ripper forward to cut the threads.
- Work in Small Sections. Keep cutting the stitches all around the armhole. Bit by bit, the sleeve will come off the body of the jacket.
- Clean Up Loose Threads. As the sleeve is off, pull any remaining threads that stick out. This method makes it possible to preserve the jacket's original finished edge. This way you will have no-frayer armholes.
Method 3: The Rip & Distress Method (For a Grungy Vibe)
If you are looking for that true army-old-battle jacket style, the aggressive technique is the one that will get you there the fastest. It really leaves an authentic frayed finish.
- Make an Incision. With the help of scissors or a craft knife, make a small cut near the armpit seam of about 1-2 inches. Do it perpendicular to the seam itself. This way you make it easier to start the rip.
- Rip It. Now, with the incision made, you need to put one hand on the jacket body and the other on the sleeve. Pull the two parts of denim apart. The denim will break by its most easy way, which is mostly along the seam due to the material's natural grainline.
- Embrace the Chaos. This is a deliberately imperfect method. The energetic chaos it brings to the project is what DIY fans love. If you need some impulse for this look, take a look the great battle jacket creators' chat where they discuss about ripping sleeves.
- Tidy Up. After you pull the sleeve off, you can cut the hanging threads that are extra long. Just keep most of the ripped edge for a true rugged style.
Mastering the Finish: From Perfecting the Fray to a No-Sew Hem
Cutting off the sleeves is just one part of the project. The way you deal with the armholes at the end will give the vest its final personality. This upcycling project is for many things. But, managing the edges is essential for a good final result.
How to Encourage and Perfect the Frayed Look
If you used the scissor or rip method, you most likely want to achieve a soft, frayed edge.
The easiest way to do this is to simply toss your new vest in the washing machine and then into the dryer. The stress and heat will naturally open the raw edges. Thus, they will form a perfect fray. If you want a more controlled or speeded fray, gently rub the edge with a medium-grit sandpaper or a pumice stone. This will help to soften the edge and also bring out the white horizontal threads.

How to Create a Clean, No-Fray Hem (With and Without Sewing)
If you prefer a clean finish, you have alternatives even without the sewing machine.
For the ones who sew, just fold the armhole raw edge under by about 1/4 inch. Iron it, then fold it again completely covering the raw edge. Topstitch it for a durable, professional hem.
A no-sew alternative is the iron-on hemming tape, which is a marvelous tool. Just fold and press the raw edge once. Then get a piece of hemming tape and cut it to fit and place it right into the fold. Press with a hot iron which is set according to the tape's instructions to fuse the hem in place.
Beyond the Cut: Style It Your Way with Your New Denim Vest
Now that you have learned how to cut sleeves off a denim jacket, it is time to unleash the real fun. Your new vest is like a blank canvas waiting for your personal touch.
- Styling Ideas: Layer your vest over anything from a normal fit t-shirt to a thick hoody to a sundress for an instant edgy look. A year-round wardrobe staple that suits every woman.
- Customization Ideas: This is your chance to really make it unique. Attach colorful embroidered patches of your favorite bands, put on a bunch of enamel pins, add metal studs along the shoulders, or even use fabric paint to create a unique art piece.
To get stimulated, a quick search will show you that TikTok is a treasure trove, full of diverse styling tutorials and videos that can ignite your creativity.
For the apparel creators who are always on the lookout for more unique ideas, getting in touch with a professional manufacturer might be the solution. The partners like china-clothing-manufacturer.com are skilled in the custom garment field. They empower you to turn your innovative visions into a fashion statement.
Conclusion: Your Jacket, Your Creativity
You have thoroughly learned how to cut sleeves off a denim jacket. With the clean and precise seam ripper method or the edgy and raw scissor-cut approach, you have used your creativity to change a standard piece of clothing into your unique version. This project illustrates that fashion is all about how you feel. The most valuable pieces of clothing are often those you make yourself.
Frequently Asked Questions (FAQ)
1. Is it possible to cut the sleeves off a denim jacket without it fraying?
Yes, it is! The best way to achieve the non-fray look is using a seam ripper, with which you carefully detach the sleeve from the jacket along the factory seam. This method will preserve the factory finish on the armhole edge. As another alternative, you can cut the sleeves off with scissors and then create a clean hem using iron-on hemming tape or a sewing machine.
2. What is the best tool for cutting denim?
If you want a controlled and straight cut, a sharp pair of dedicated fabric scissors is definitely the best tool. A rotary cutter with a self-healing mat also provides excellent performance in terms of clean lines. To deconstruct at the seam, the seam ripper is the best option. Do not use regular household or paper scissors as they tend to crush the denim fibers. This will result in a jagged and messy edge.
3. How can I be sure both armholes will be the same size?
The trick is in the symmetry. As soon as you remove the first sleeve, leave the jacket flat and fold it exactly in half length-ways. Make sure to align the shoulder seams correctly and the bottom hem. Use the already cut armhole as a guide to draw a line with tailor's chalk on the second side. Thus, there is no way that the armholes will differ.
4. What can I do with leftover denim sleeves?
Don't throw them away! The leftover sleeves are good for other DIY projects. You can use the fabric to create patches, add pockets to another garment, sew a small pouch or cell phone case, or use them as a test swatch for distressing techniques like bleaching, sanding, or painting.
5. If I wash the vest, will it make the armholes fray too much?
Washing will definitely contribute to fraying. Sometimes this is the desired effect. If you like the frayed look but you want to control the degree of fraying you can sew a single line of stitching about a half-inch away from the raw edge. This line of stitching will act as a barrier to prevent further fraying.